 Product support
User manuals (in Hungarian):
▼ Sygic download and installation guide
Installing Sygic GPS Navigation
The screenshots shown are for illustration only!
1. Downloading and installing the software
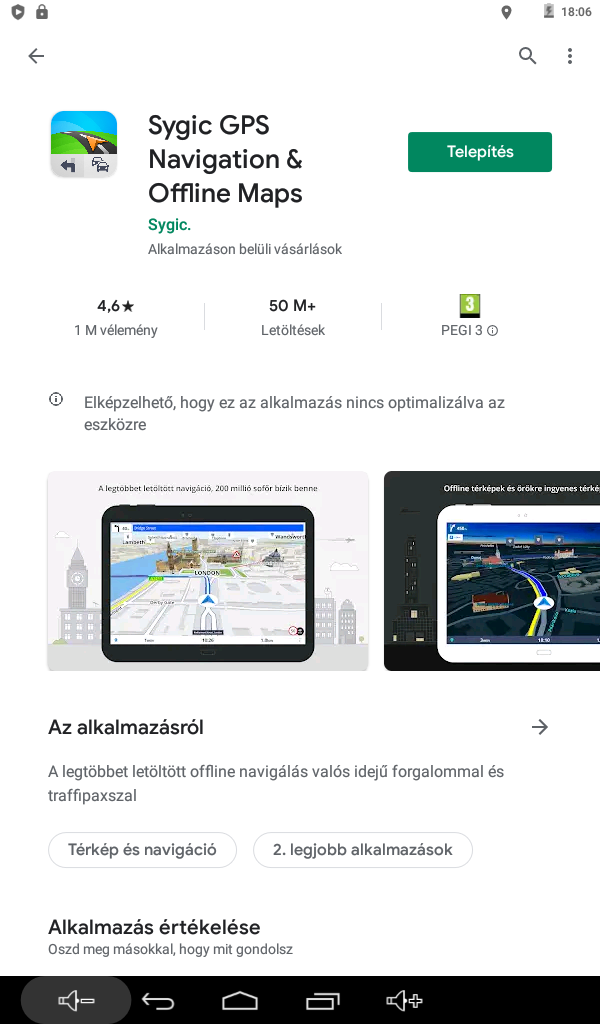
1.1. Download the app on your device from the Google Play Store. Type "Sygic: GPS navigation" into the search field and choose "Sygic: GPS Navigation" from the results. The software is downloaded and installed automatically.
1.2. Once the software has been downloaded and installed, you will find a "Sygic" icon among your apps.
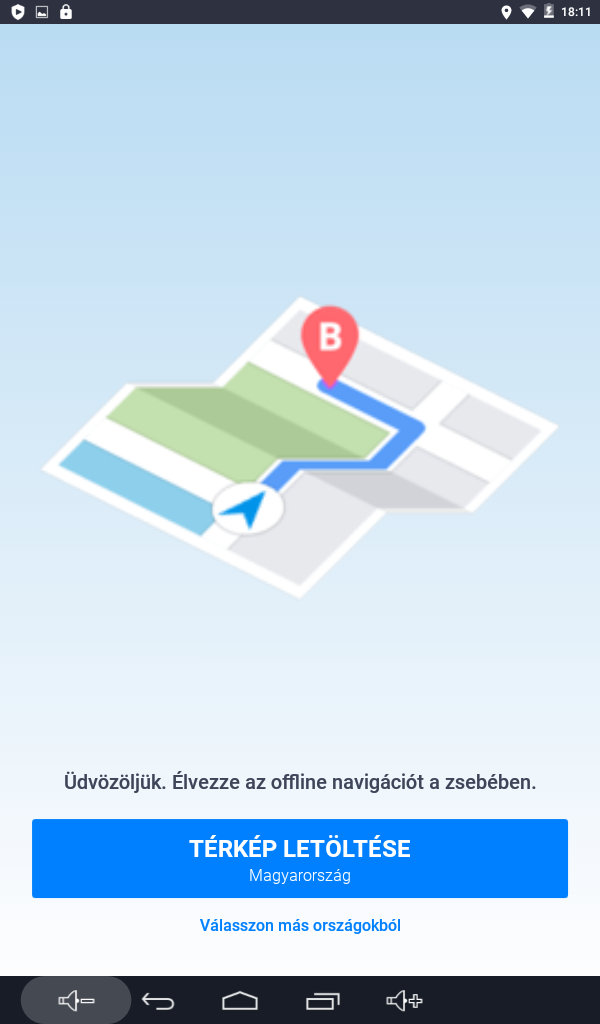
1.3. Tap the "Sygic" icon to start the software.
When it starts, it automatically finds the map for your
region and offers to download it.
You can reach additional countries by tapping "Choose from other countries".
If you do not select additional countries now, you can do so later under "Manage maps" in the Menu.
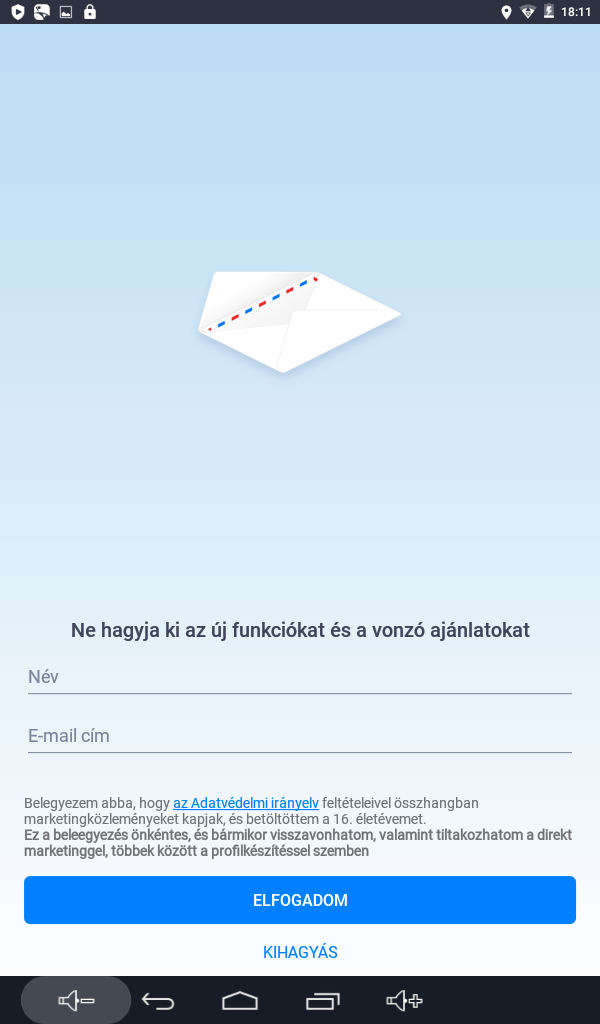
1.4. On the next screen you can enter an e-mail address to register a Sygic account.
This may be important for later purchases. You can also create a Sygic account later under "Sign in" in the Menu.
If you do not want to create a Sygic account now, you can skip this step by tapping "Skip".
1.5. The download of the map(s) and additional components starts. Resources only need to be installed the first time and after a software update.
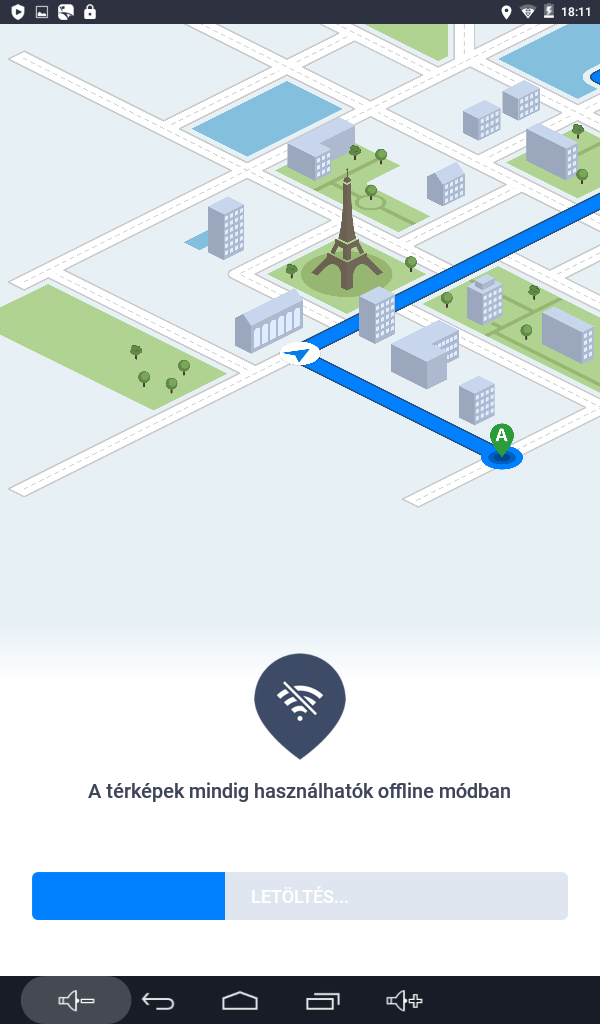
1.6. You can follow the progress of the download on the screen. The following screen tells you when the download is complete:
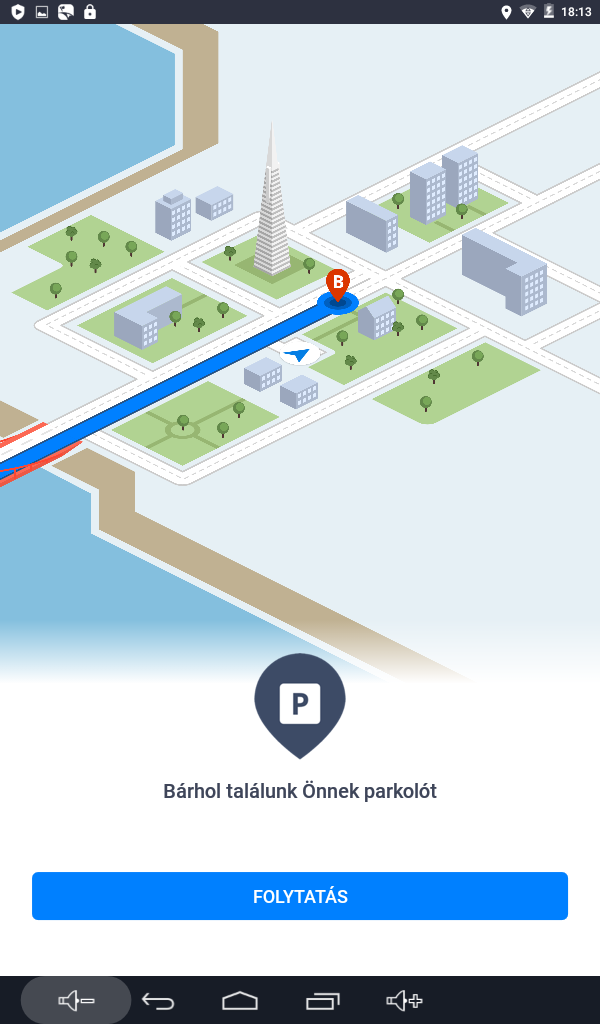
1.7. After you press "Continue", the software shows the data processing information.
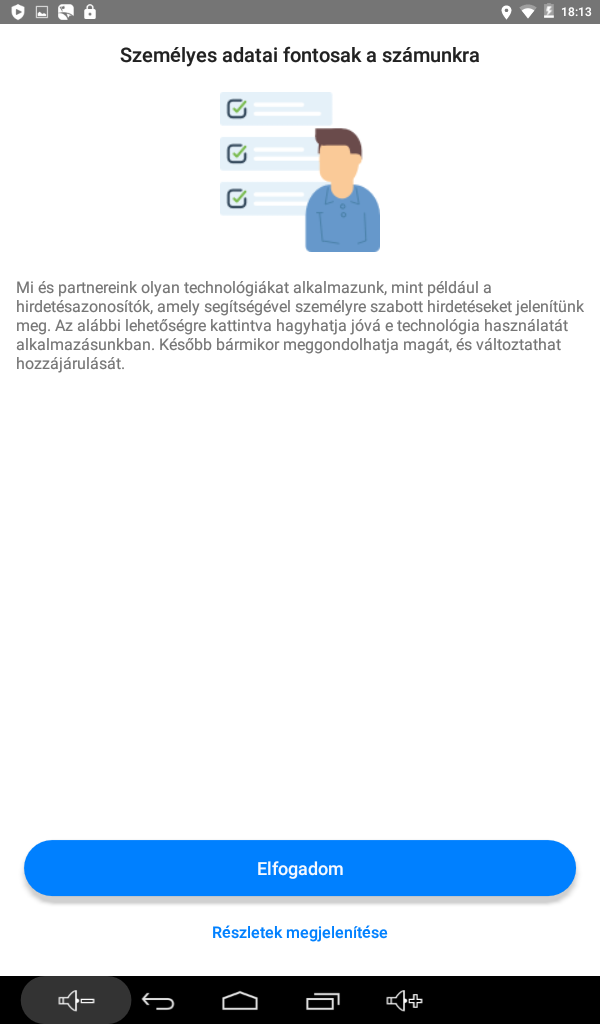
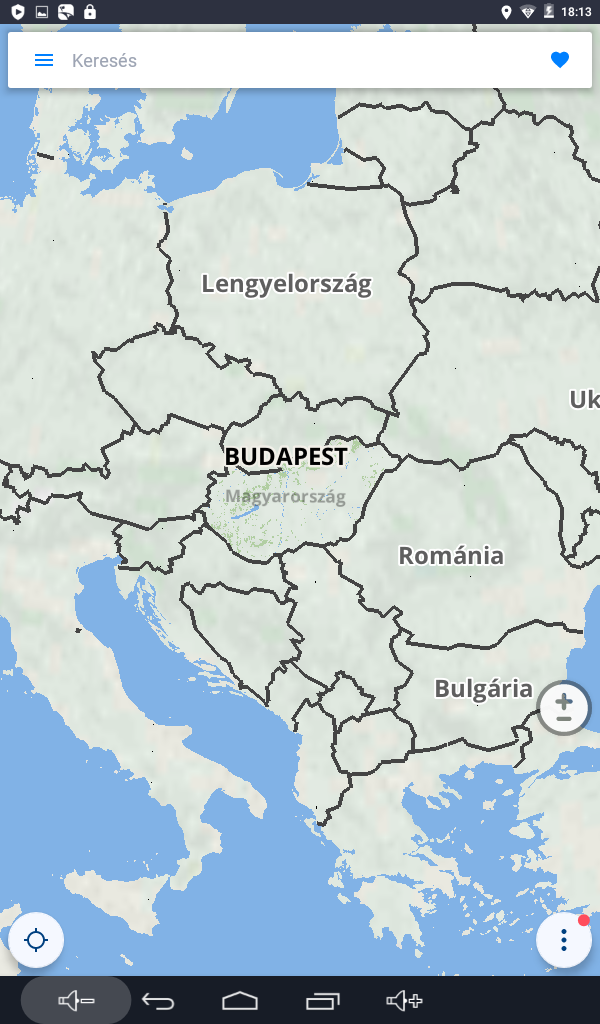
1.8. After you press "Accept", the software is ready to use.
2. Activation
2.1. To use all the features of the software, it must be activated. The code in the package allows you to use the maps of the countries in the Full Europe region. To activate, open the Menu and choose "Sygic Store".
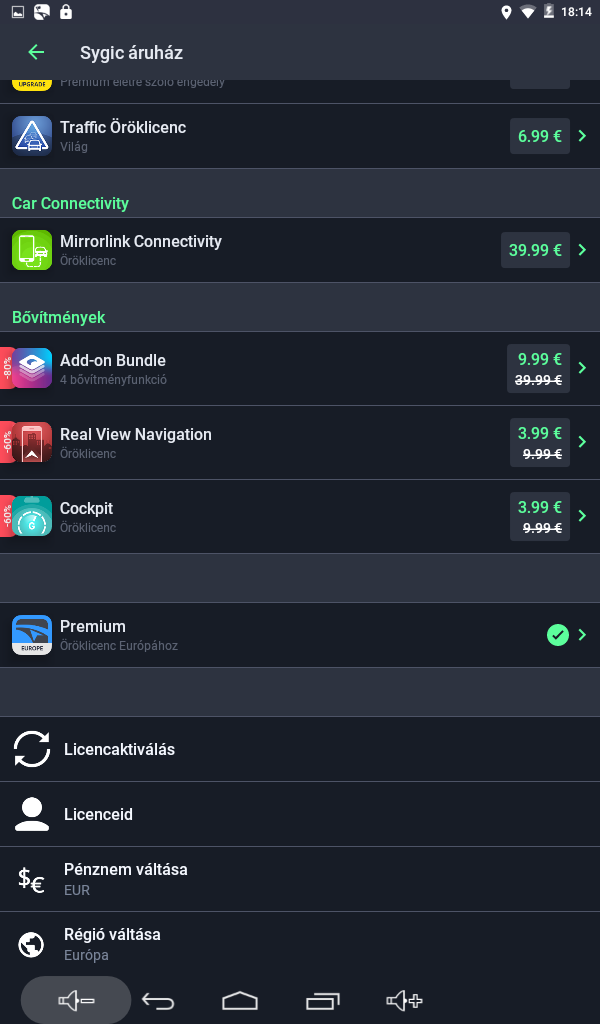
2.2. Open "Activate licence".
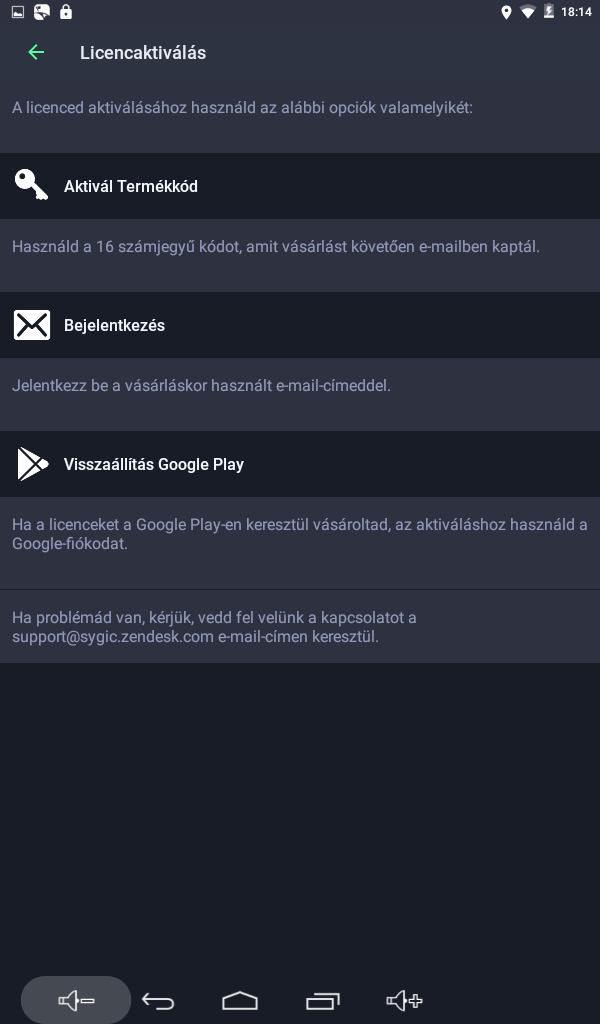
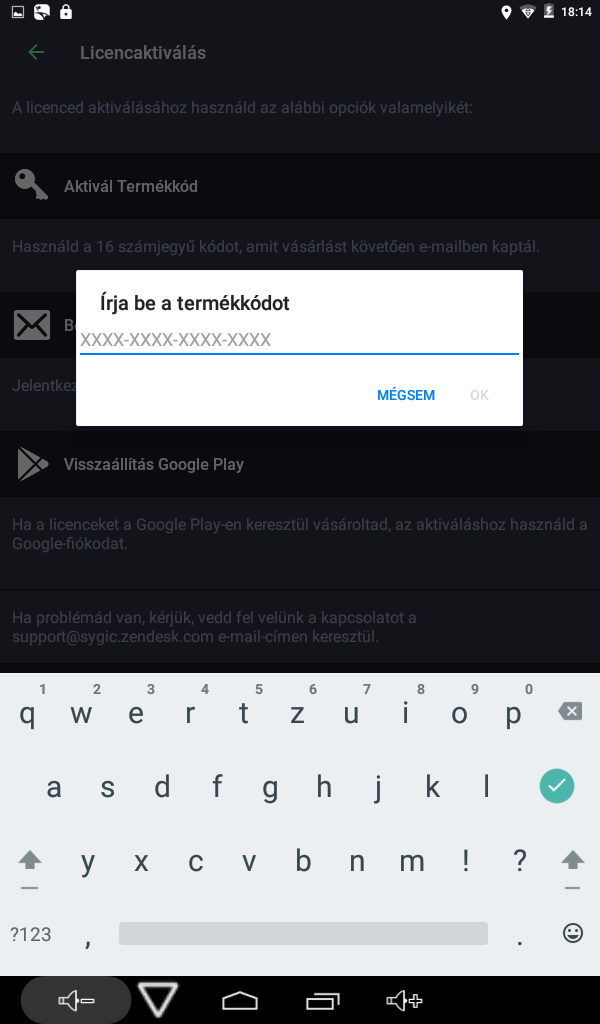
2.3. Choose "Activate product code" and enter the code found on the voucher / in the box. The software carries out the activation over the Internet, after which you can use it without restrictions.
3. Downloading additional maps
3.1. If you did not select additional maps during installation, you can do so later. To do this, choose "Manage maps" in the main menu.
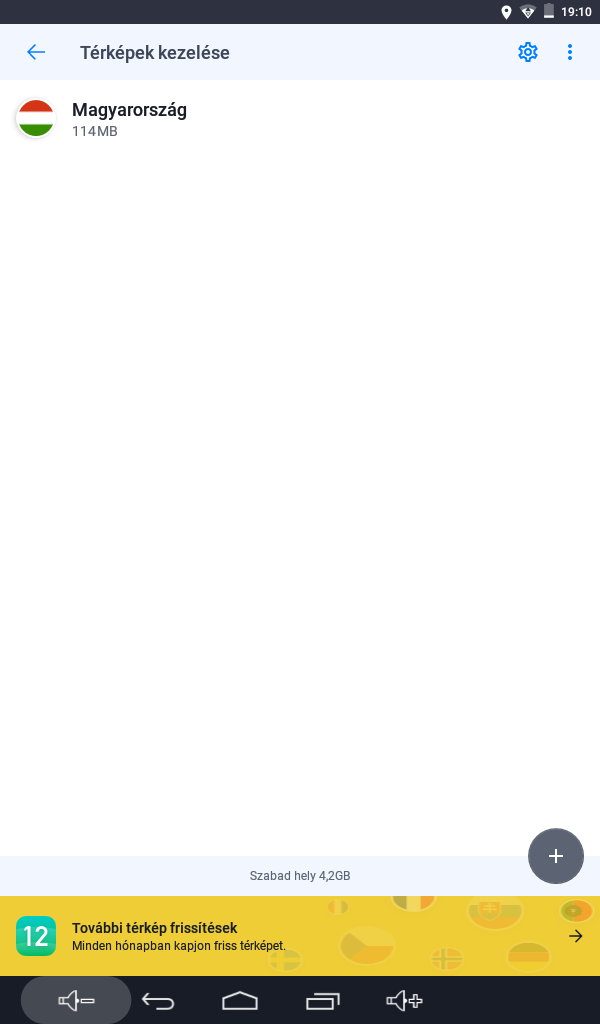
3.2. To add more maps, tap the "+" button. Select the region. The licence activated with the voucher makes the software fully usable with the maps of the Europe region.
3.3. The list of countries in the region appears. The download size of each map is shown in the list. Select the countries you want. The map of the first country you select starts downloading; the other countries are added to a queue. Countries that are already installed are marked in blue. Some countries may contain further regions (e.g. the United Kingdom); this is indicated by "Contains regions" under the country's name. To install these, select the country and then the region you want. If needed, you can select all regions at once with "Download all regions" at the top of the screen.
The Full Europe package is more than 4 GB of data, so we recommend downloading it over a Wi-Fi connection.
Please note that the software needs at least 5 MB of storage to run, so only download as many countries at once as will fit in the available storage. You can add maps from the available list at any time.
If there is not enough storage in the device's memory, you can move the maps to a memory card. To do this, follow the steps at the bottom of this guide.
Moving the software to a memory card
The device's internal memory may not have enough storage to download all the maps. If the device supports memory cards, the software installation and its data can be moved to the memory card. To do this, follow these steps:
1. Install the app as described above.
2. Open the Menu.
3. Open Settings.
4. Under Map and data storage, select the storage location where you want to keep the maps.
Additional maps can be downloaded under "Manage maps" as described in step 3 above.
(can only be used with the Sygic GPS Navigation PNA and Sygic: Voucher Edition Android software)
POI conversion
Required parameters of TXT files
- Only text files can be imported (files with the .txt extension)
- The converter supports the ASCII, UTF8 and UNICODE formats
- The separator used in the first line of the TXT file must be "|"
- The parameters of each POI must follow in this order: longitude | latitude | name | address | phone | fax | web | email | short description | long description
- The first 3 parameters are mandatory (longitude, latitude, name)
- You do not have to provide every parameter
- You may omit some parameters (except longitude, latitude and name), but you must leave an empty space in place of the omitted parameters
Example:
separator=|
-0.075771|51.332663|Esso petrol station|Greater London
-0.075771|51.332663|Esso petrol station|Greater London, Addington Rd, Bromley
-0.075771|51.332663|Esso petrol station|Greater London, Addington Rd,
Bromley|||www.esso.com|esso@esso.com
Converting to RUPI format
- Download the converter here
- Extract it and run the application on a PC
- Click "Browse Files" to find the folder. The converter offers its own folder first.
- Select the .txt file you want to convert.
- Click "Convert to RUPI" to start the conversion. Sygic GPS Navigation can handle both .upi and .rupi files, so there is no need to convert .upi files to .rupi format.
Importing POIs into the software
- Copy the .upi/.rupi files directly into the /maps/import folder. Do not copy folders.
- Start the Sygic GPS Navigation app.
- A wizard window appears and carries out the POI import.
Maps:
For updating maps; can only be used with Sygic GPS Navigation PNA (version 12.1 or later) and Sygic Truck Navigation (version 13.2 or later)
Using Sygic Assistant
With the Sygic Assistant software you can update your navigation software. Sygic Assistant can only be used from version 12.1 of Sygic GPS Navigation and version 13.2 of Sygic Truck 3D Navigation released for Windows CE. To use Sygic Assistant you need a Sygic account; you will find help with creating one below.
Creating a Sygic account
A Sygic account may be required for some features of the software and for using Sygic Assistant.
On a device with an Internet connection you can create a new account from within the software. To do so, choose Connect in the Settings menu. If you have not set up an account yet, you can do so by choosing More options. Choose Create new account and enter an e-mail address and a password. After entering the details, tap Create. Your new account is then ready to use.
Sygic Assistant runs on Windows XP, Windows Vista and Windows 7. Download the software from the link below and install it.
Download Sygic Assistant
Before starting the software, connect the device to the computer in removable disk mode, or insert the memory card containing the map software into a card reader.
An update through Sygic Assistant can only be carried out if there is enough free space on the storage medium to download the map package. You therefore need to take the following steps:
-
Make a backup copy of the contents of the storage medium.
-
Delete the folders in the Maps folder and their contents, except for the content.info, content.lic and footprint.info files.
Start Sygic Assistant. Sygic Assistant detects the version of the map software.
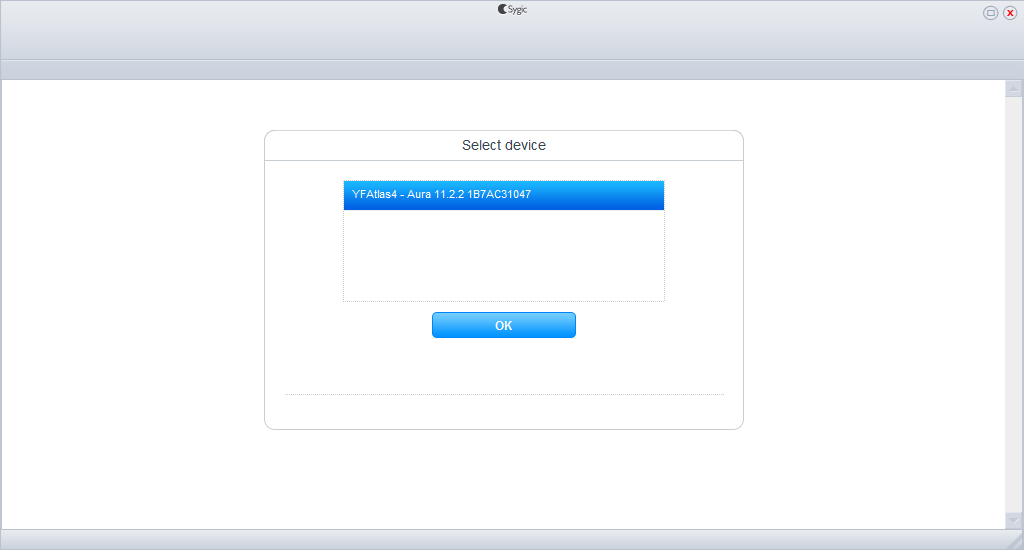
Click "OK".
On the next screen, enter your Sygic account details and click "Login".
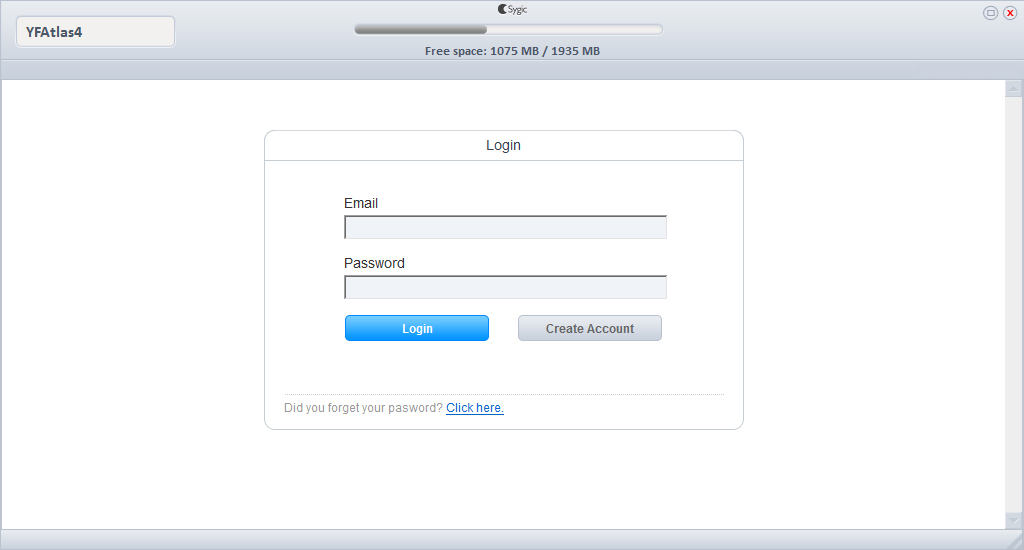
If you do not have a Sygic account yet, you can create one by clicking "Create Account".
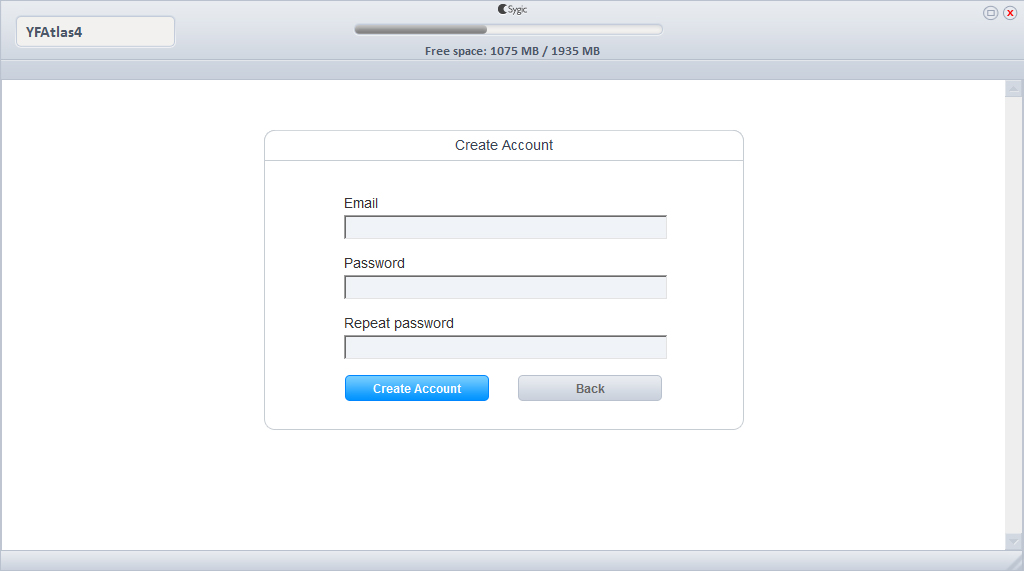
Enter your e-mail address and the password you want (Password), then repeat the password
(Repeat password). After entering the details, click "Create Account".
Once you are logged in with your Sygic account, select the maps you want to buy or update.
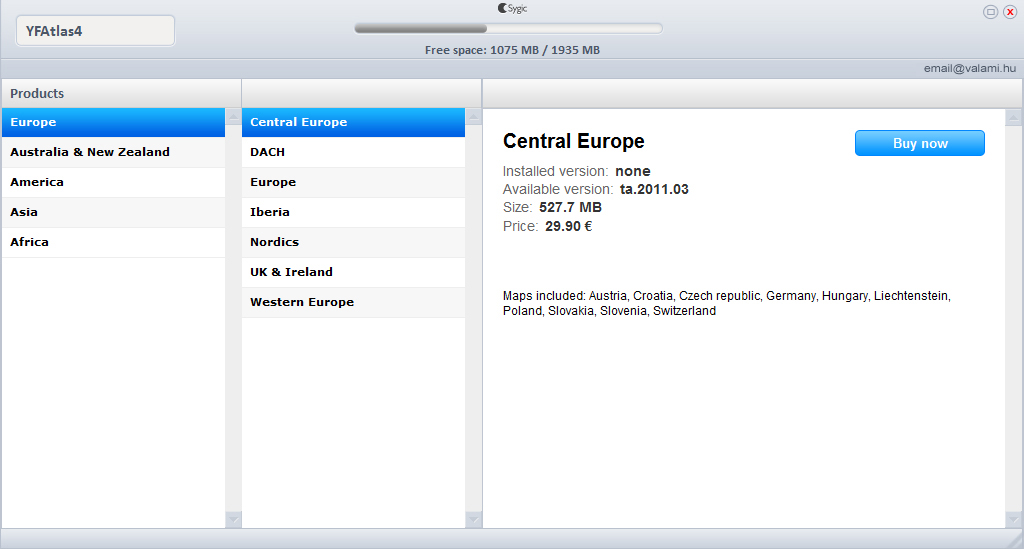
To start the purchase, click the "Buy" or "Download" button.
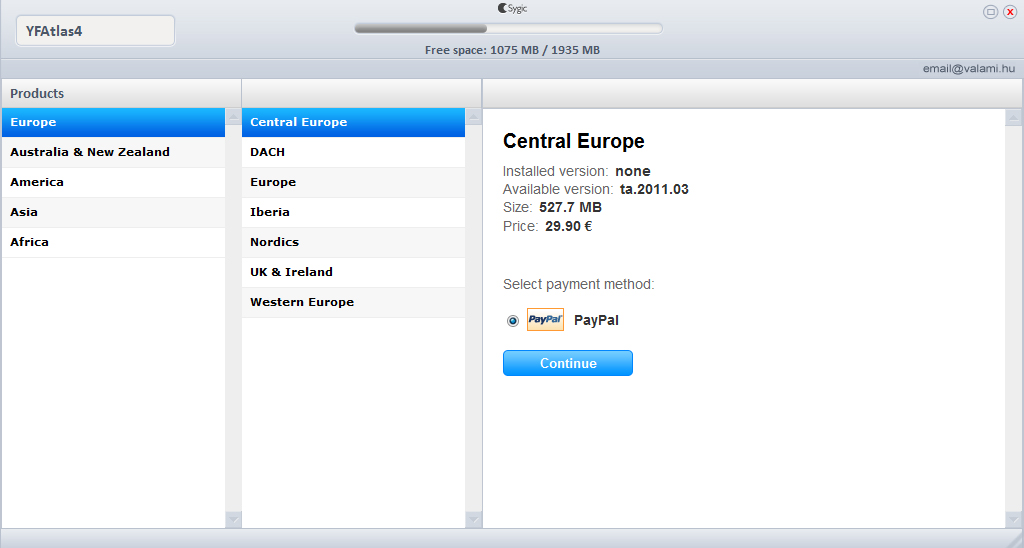
The purchase is made through PayPal, so it is secure. If you do not have a PayPal account yet, you can create one at the link below:
You can find more information about PayPal here:
To complete the purchase, click "Continue".
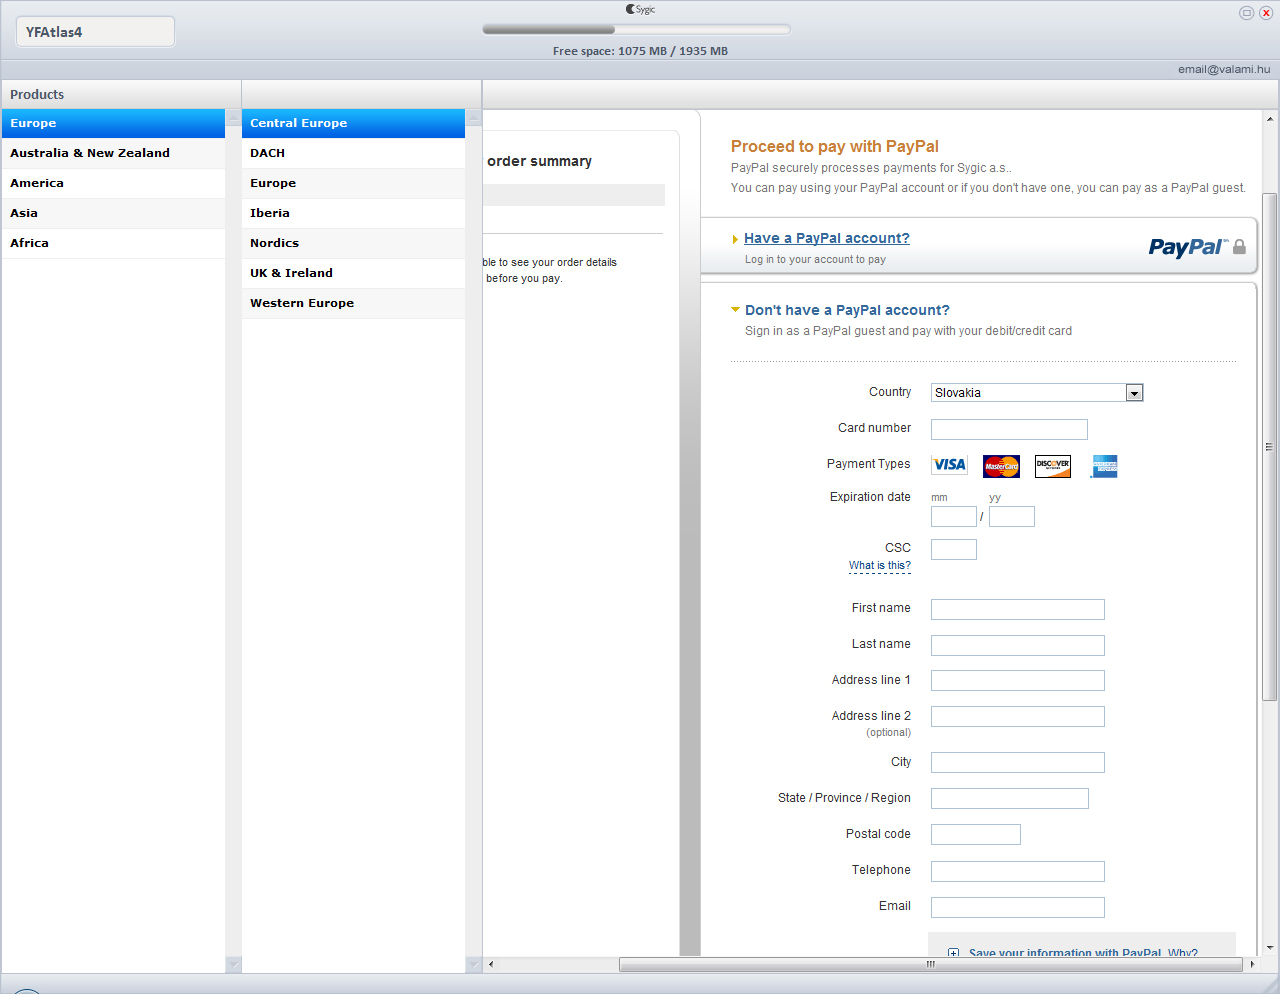
At the end of the purchase you can download the maps you have bought.
If there is not enough free space on the storage medium, create a folder called "Maps" in the root folder of another storage medium with enough space, copy the files named in step 2 into that folder, and then carry out the download. After the download, copy the folders for the maps of the countries you want, and the wcl folder, from the storage medium used for the download to the original storage medium. Make sure that at least 100 MB of free space remains on the storage medium for running the software. The software can only be run from the original storage medium.
Guides:
▼ Download and installation guide for the new Sygic Navigation GPS software
(formerly Sygic: Voucher Edition)
Installing Sygic GPS Navigation
The screenshots shown are for illustration only!
1. Downloading and installing the software
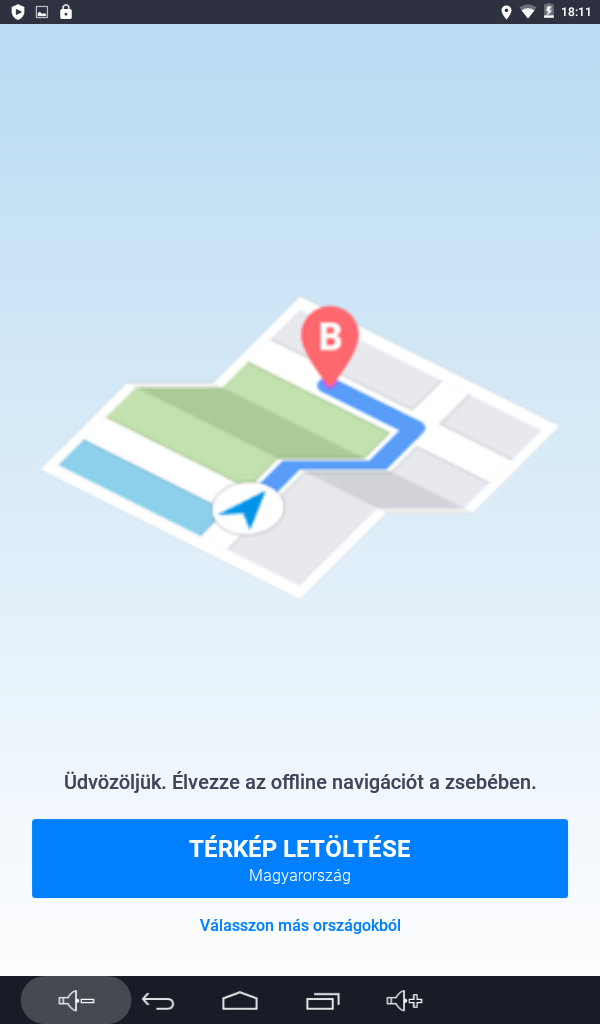
1.1. Download the app on your device from the Google Play Store. Type "Sygic: GPS navigation" into the search field and choose "Sygic: GPS Navigation" from the results. The software is downloaded and installed automatically.
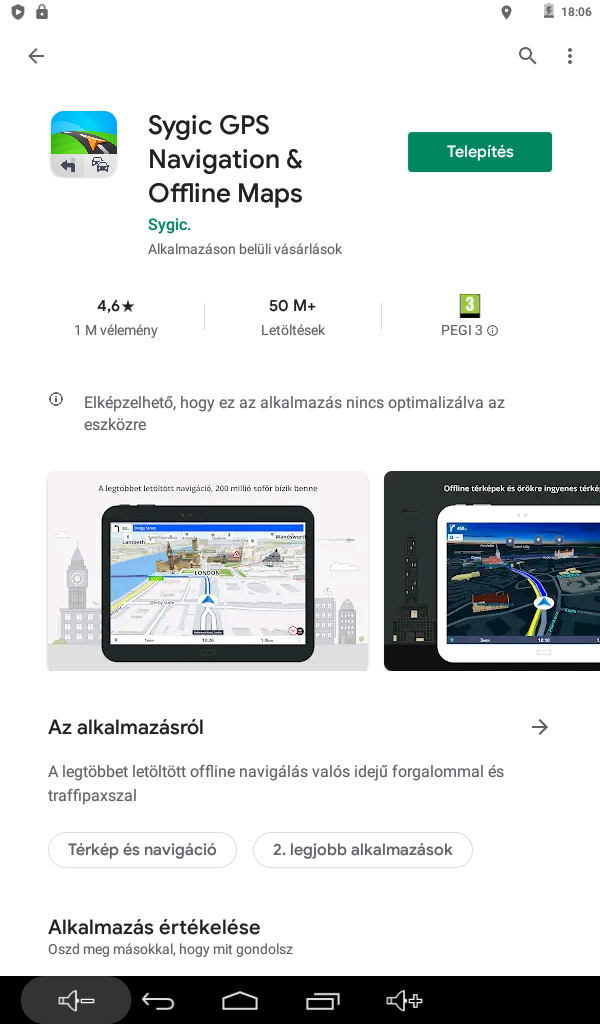
1.2. Once the software has been downloaded and installed, you will find a "Sygic" icon among your apps.
1.3. Tap the "Sygic" icon to start the software.
When it starts, it automatically finds the map for your
region and offers to download it.
You can reach additional countries by tapping "Choose from other countries".
If you do not select additional countries now, you can do so later under "Manage maps" in the Menu.
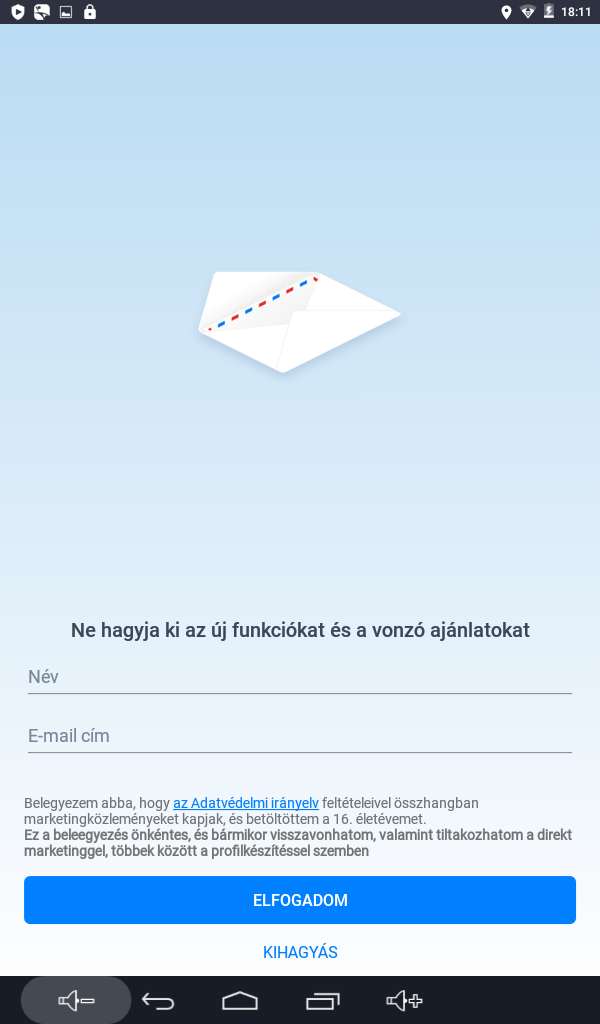
1.4. On the next screen you can enter an e-mail address to register a Sygic account.
This may be important for later purchases. You can also create a Sygic account later under "Sign in" in the Menu.
If you do not want to create a Sygic account now, you can skip this step by tapping "Skip".
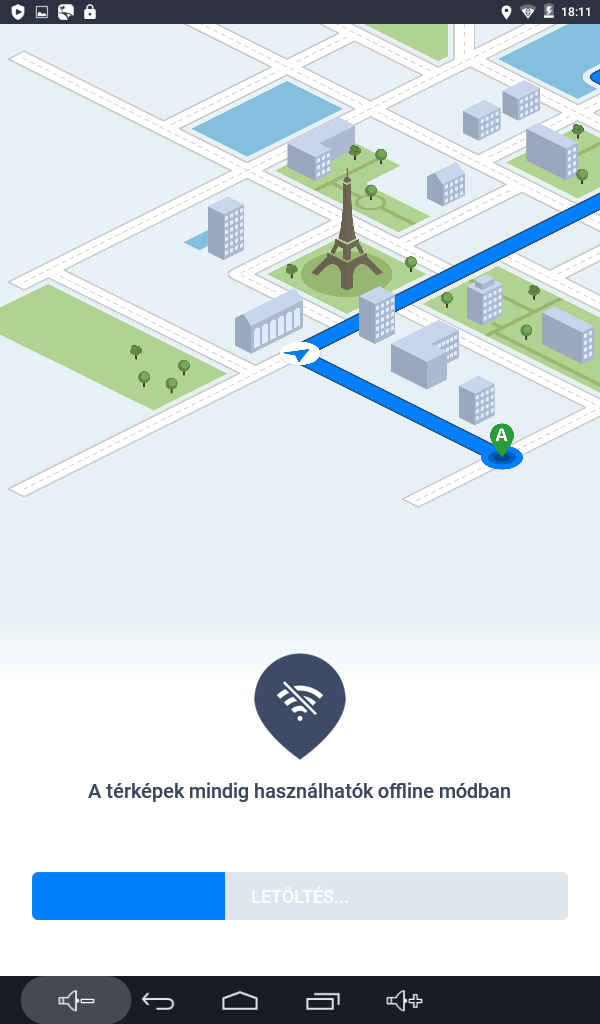
1.5. The download of the map(s) and additional components starts. Resources only need to be installed the first time and after a software update.
1.6. You can follow the progress of the download on the screen. The following screen tells you when the download is complete:
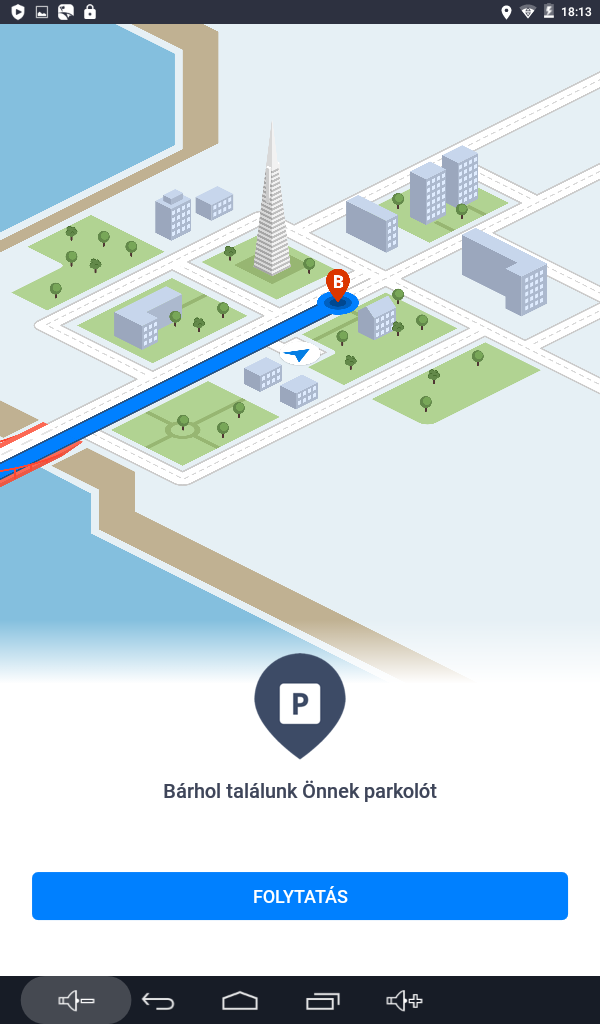
1.7. After you press "Continue", the software shows the data processing information.
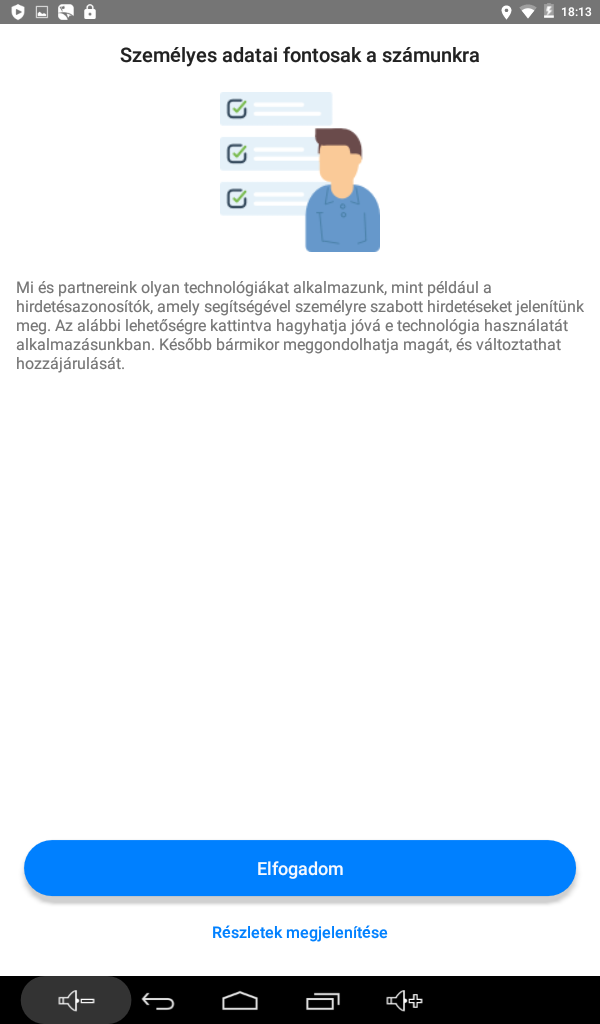
1.8. After you press "Accept", the software is ready to use.
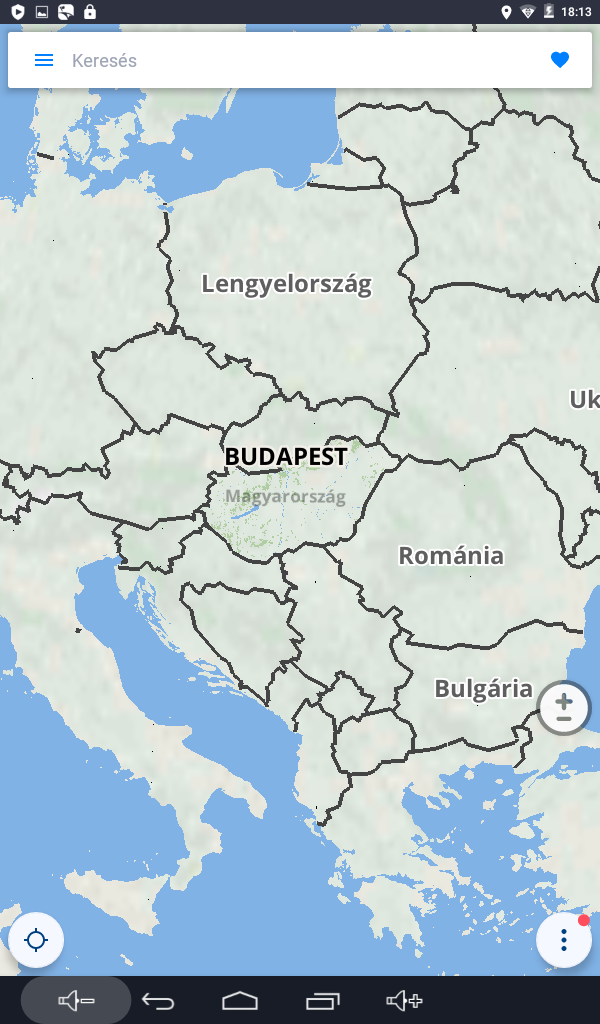
2. Activation
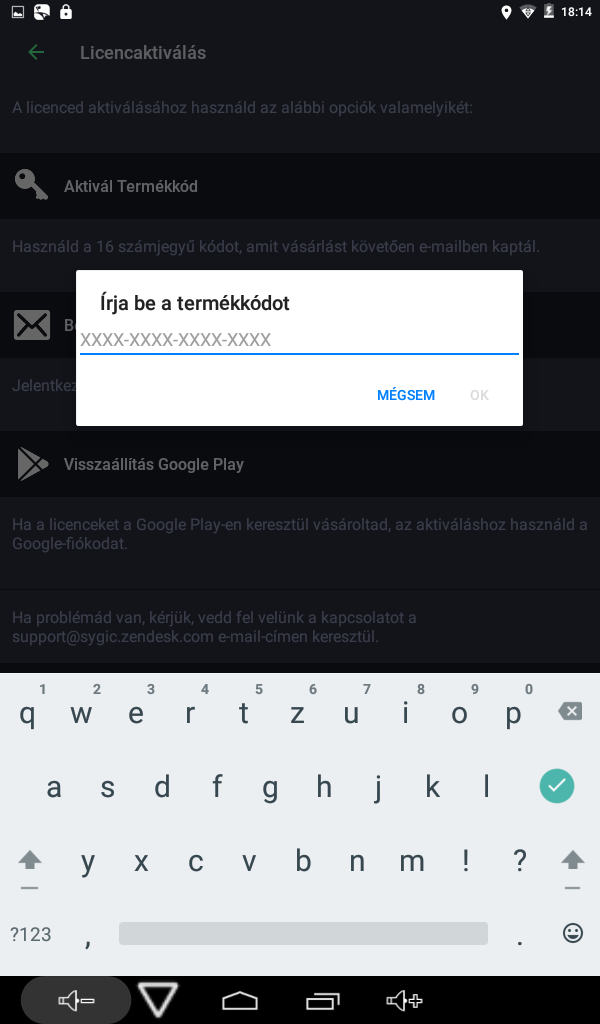
2.1. To use all the features of the software, it must be activated. The code in the package allows you to use the maps of the countries in the Full Europe region. To activate, open the Menu and choose "Sygic Store".
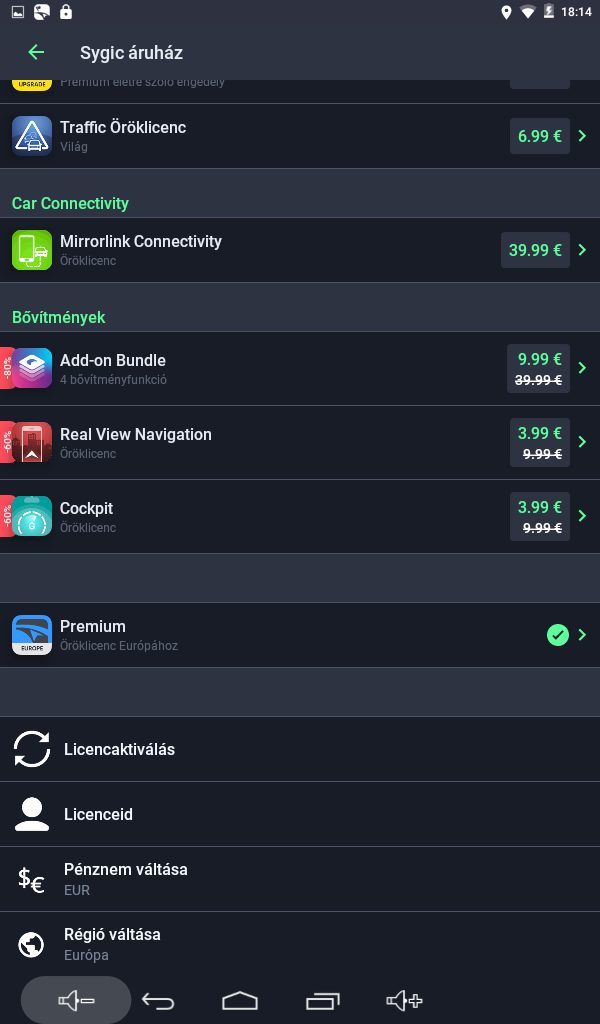
2.2. Open "Activate licence".
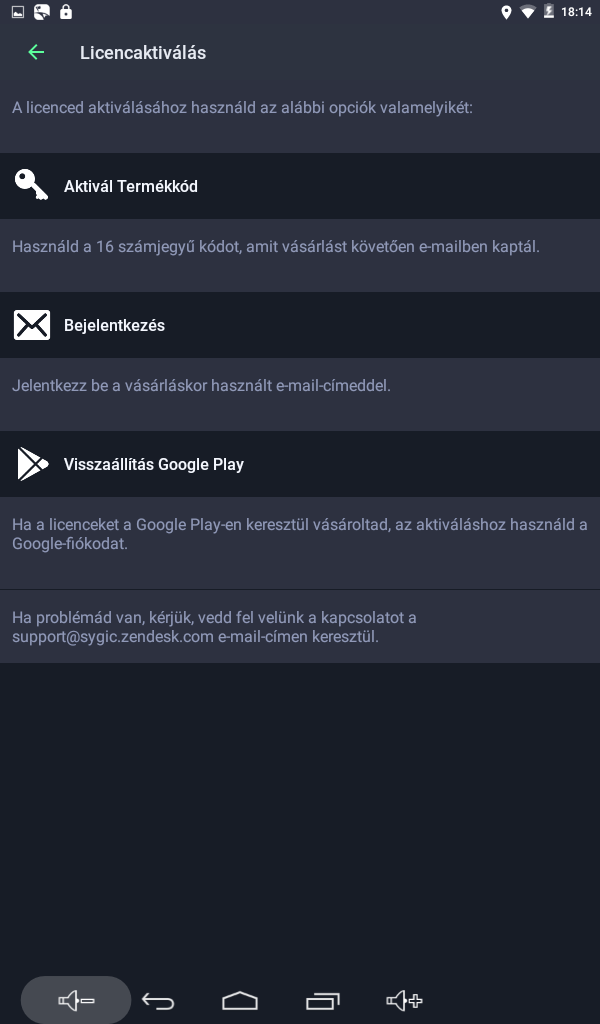
2.3. Choose "Activate product code" and enter the code found on the voucher / in the box. The software carries out the activation over the Internet, after which you can use it without restrictions.
3. Downloading additional maps
3.1. If you did not select additional maps during installation, you can do so later. To do this, choose "Manage maps" in the main menu.
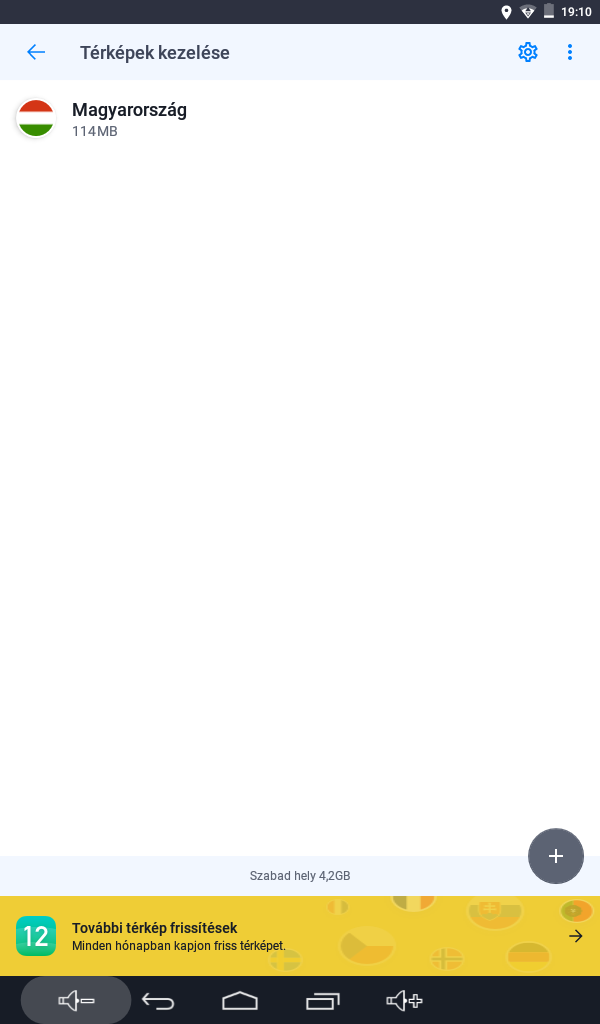
3.2. To add more maps, tap the "+" button. Select the region. The licence activated with the voucher makes the software fully usable with the maps of the Europe region.
3.3. The list of countries in the region appears. The download size of each map is shown in the list. Select the countries you want. The map of the first country you select starts downloading; the other countries are added to a queue. Countries that are already installed are marked in blue. Some countries may contain further regions (e.g. the United Kingdom); this is indicated by "Contains regions" under the country's name. To install these, select the country and then the region you want. If needed, you can select all regions at once with "Download all regions" at the top of the screen.
The Full Europe package is more than 4 GB of data, so we recommend downloading it over a Wi-Fi connection.
Please note that the software needs at least 5 MB of storage to run, so only download as many countries at once as will fit in the available storage. You can add maps from the available list at any time.
If there is not enough storage in the device's memory, you can move the maps to a memory card. To do this, follow the steps at the bottom of this guide.
Moving the software to a memory card
The device's internal memory may not have enough storage to download all the maps. If the device supports memory cards, the software installation and its data can be moved to the memory card. To do this, follow these steps:
1. Install the app as described above.
2. Open the Menu.
3. Open Settings.
4. Under Map and data storage, select the storage location where you want to keep the maps.
Additional maps can be downloaded under "Manage maps" as described in step 3 above.